给寻找编程代码教程的朋友们精选了Fetch跨域请求相关的编程文章,网友相鸿运根据主题投稿了本篇教程内容,涉及到React、Native、Fetch、跨域请求、详解React Native 采用Fetch方式发送跨域POST请求相关内容,已被165网友关注,涉猎到的知识点内容可以在下方电子书获得。
详解React Native 采用Fetch方式发送跨域POST请求
Fetch以后是趋势,势必要取代传统的Ajax,而且RN框架支持Fetch。下面仅做了一个跨域请求的例子,在本域请求是一样的,而且更简单一些。客户端环境用的是RN写的一个页面,也可以用浏览器的console控制台模拟。后端服务用的是NodeJs express框架。

1)Fetch请求
//发送Ajax请求
 sendAjax(){
  //POST方式,IP为本机IP
  fetch("http://192.168.111.102:8085", {
   method: "POST",
   mode: "cors",
   headers: {
    "Content-Type": "application/x-www-form-urlencoded"
   },
   body: 'key=1'
  }).then(function (res) {
   console.log("fetch request ", JSON.stringify(res.ok));
   if(res.ok){
    res.json().then(function (json) {
     console.info(json);
     Alert.alert('提示','来自后台数据:名字'+json.name+'、年龄'+json.age,[{text: '确定', onPress: () => console.log('OK Pressed!')},]);
    });
   }else{
    Alert.alert('提示','请求失败',[{text: '确定', onPress: () => console.log('OK Pressed!')},]);
   }

  }).catch(function (e) {
   console.log("fetch fail");
   Alert.alert('提示','系统错误',[{text: '确定', onPress: () => console.log('OK Pressed!')},]);
  });
 }
1、mode属性控制是否允许跨域。same-origin(同源请求)、no-cors(默认)和cros(允许跨域请求),第一种跨域求情会报error,第二种可以请求其他域的脚本、图片和其他资源,但是不能访问response里面的属性,第三种可以获取第三方数据,前提是所访问的服务允许跨域访问。否则,会出现如下错误:

2、Fetch请求后台时,返回时一个Promise对象。对象支持解析返回数据的方法有:arrayBuffer()、blob()、formData()、json()、text()。
3、Body传入参数,注意!注意!注意!重要的事情说三次,只能传啊a=1&b=2...这种参数形式,不可传对象{a:1,b:2,...},用JSON.stringify({a:1,b:2,...})也不行。在jquery中,传入对象框架会自动封装成formData的形式,fetch没有这个功能。
4、使用时请注意浏览器版本,低版本不支持此对象。RN是可以用的
2)Nodejs express框架开启允许跨域请求:
//设置跨域访问
app.all('*', function(req, res, next) {
 res.header("Access-Control-Allow-Origin", "*");
 res.header("Access-Control-Allow-Headers", "X-Requested-With");
 res.header("Access-Control-Allow-Methods","PUT,POST,GET,DELETE,OPTIONS");
 res.header("X-Powered-By",' 3.2.1');
 res.header("Content-Type", "application/json;charset=utf-8");
 next();
});
3)Nodejs express框架开启处理POST数据功能,默认POST请求的参数是在请求体里面,用res.query是获取不到的,为{};需要使用res.body获取,前提是要在express框架里面开启body解析功能,否则显示undefined。
var express = require('express');
//Post方式请求参数放在请求体里面,需引用body-parser解析body
var bodyParser = require("body-parser");
var app = express();

// 引用
app.use(bodyParser.urlencoded({ extended: false }));
4)支持jsonp方式跨域访问,开启跨域访问后用传统的jsonp方式请求时,会报错。因为jsonp请求需要返回一个callback包裹的数据,否则解析出错。此处有一个坑,用$.ajax({method:'POST',dataType:'jsonp'})方式请求时,依然发送的是GET请求。
//json数据
var data = { "name": "Test", "age": "19" };

app.get('/', function(req, res) {
 console.log('get..........');
 console.log(req.query);
 if (req.query && req.query.callback) {
  var str = req.query.callback + "(" + JSON.stringify(data) + ")"; //jsonp
  console.log('jsonp: '+str);
  res.end(str);
 }else{
  console.log('json: '+JSON.stringify(data));
  res.end(JSON.stringify(data));
 }
});
5)完整代码:
1、RN前端
 /**
 * Created by linyufeng on 2016/8/22.
 */

import React, { Component } from 'react';
import {
 AppRegistry,
 StyleSheet,
 Text,
 TouchableHighlight,
 Alert,
 View
} from 'react-native';

class HelloWorld extends Component {
//发送Ajax请求
 sendAjax(){
  //POST方式
  fetch("http://192.168.111.102:8085", {
   method: "POST",
   mode: "cors",
   headers: {
    "Content-Type": "application/x-www-form-urlencoded"
   },
   body: 'key=1'
  }).then(function (res) {
   console.log("fetch request ", JSON.stringify(res.ok));
   if(res.ok){
    res.json().then(function (json) {
     console.info(json);
     Alert.alert('提示','来自后台数据:名字'+json.name+'、年龄'+json.age,[{text: '确定', onPress: () => console.log('OK Pressed!')},]);
    });
   }else{
    Alert.alert('提示','请求失败',[{text: '确定', onPress: () => console.log('OK Pressed!')},]);
   }

  }).catch(function (e) {
   console.log("fetch fail");
   Alert.alert('提示','系统错误',[{text: '确定', onPress: () => console.log('OK Pressed!')},]);
  });
 }
 render() {
  return (
   <View style={styles.container}>
    <TouchableHighlight style={styles.wrapper}
     onPress={this.sendAjax}>
     <View style={styles.button}>
      <Text>点击发送Ajax请求</Text>
     </View>
    </TouchableHighlight>
   </View>
  );
 }
}

const styles = StyleSheet.create({
 container: {
  flex: 1,
  justifyContent: 'center',
  alignItems: 'center',
  backgroundColor: '#F5FCFF',
 },
 wrapper: {
  borderRadius: 5,
  marginBottom: 5,
 },
 button: {
  backgroundColor: '#eeeeee',
  padding: 10,
 },
});

AppRegistry.registerComponent('HelloWorld', () => HelloWorld);
2、NodeJs
/**
* Created by linyufeng on 2016/8/22.
*/
var express = require('express');
//Post方式请求参数放在请求体里面,需引用body-parser解析body
var bodyParser = require("body-parser");
var app = express();
// 引用
app.use(bodyParser.urlencoded({ extended: false }));
//设置跨域访问
app.all('*', function(req, res, next) {
res.header("Access-Control-Allow-Origin", "*");
res.header("Access-Control-Allow-Headers", "X-Requested-With");
res.header("Access-Control-Allow-Methods","PUT,POST,GET,DELETE,OPTIONS");
res.header("X-Powered-By",' 3.2.1');
res.header("Content-Type", "application/json;charset=utf-8");
next();
});
//json数据
var data = { "name": "Test", "age": "19" };
app.get('/', function(req, res) {
console.log('get..........');
console.log(req.query);
if (req.query && req.query.callback) {
var str = req.query.callback + "(" + JSON.stringify(data) + ")"; //jsonp
console.log('jsonp: '+str);
res.end(str);
}else{
console.log('json: '+JSON.stringify(data));
res.end(JSON.stringify(data));
}
});
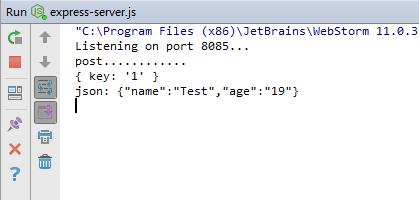
app.post('/', function(req, res) {
console.log('post............');
console.log(req.body);
console.log('json: '+JSON.stringify(data));
res.end(JSON.stringify(data));
});
app.listen(8085, function () {
console.log('Listening on port 8085...');
});
以上就是本文的全部内容,希望对大家的学习有所帮助,也希望大家多多支持码农之家。