为找教程的网友们整理了Python相关的编程文章,网友段晓瑶根据主题投稿了本篇教程内容,涉及到Python、ElasticSearch、Python 操作 ElasticSearch的完整代码相关内容,已被878网友关注,涉猎到的知识点内容可以在下方电子书获得。
Python 操作 ElasticSearch的完整代码
官方文档:https://elasticsearch-py.readthedocs.io/en/master/
1、介绍
python提供了操作ElasticSearch 接口,因此要用python来操作ElasticSearch,首先要安装python的ElasticSearch包,用命令pip install elasticsearch安装或下载安装:https://pypi.python.org/pypi/elasticsearch/5.4.0
2、创建索引
假如创建索引名称为ott,类型为ott_type的索引,该索引中有五个字段:
title:存储中文标题,
date:存储日期格式(2017-09-08),
keyword:存储中文关键字,
source:存储中文来源,
link:存储链接,
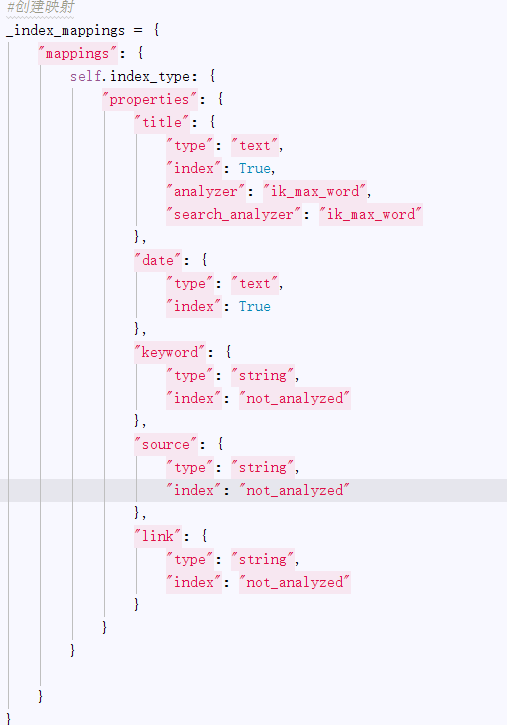
创建映射:

3、索引数据
批量索引
利用bulk批量索引数据
4、查询索引
5、删除数据
6、完整代码
#coding:utf8
import os
import time
from os import walk
import CSVOP
from datetime import datetime
from elasticsearch import Elasticsearch
from elasticsearch.helpers import bulk
class ElasticObj:
def __init__(self, index_name,index_type,ip ="127.0.0.1"):
'''
:param index_name: 索引名称
:param index_type: 索引类型
'''
self.index_name =index_name
self.index_type = index_type
# 无用户名密码状态
#self.es = Elasticsearch([ip])
#用户名密码状态
self.es = Elasticsearch([ip],http_auth=('elastic', 'password'),port=9200)
def create_index(self,index_name="ott",index_type="ott_type"):
'''
创建索引,创建索引名称为ott,类型为ott_type的索引
:param ex: Elasticsearch对象
:return:
'''
#创建映射
_index_mappings = {
"mappings": {
self.index_type: {
"properties": {
"title": {
"type": "text",
"index": True,
"analyzer": "ik_max_word",
"search_analyzer": "ik_max_word"
},
"date": {
"type": "text",
"index": True
},
"keyword": {
"type": "string",
"index": "not_analyzed"
},
"source": {
"type": "string",
"index": "not_analyzed"
},
"link": {
"type": "string",
"index": "not_analyzed"
}
}
}
}
}
if self.es.indices.exists(index=self.index_name) is not True:
res = self.es.indices.create(index=self.index_name, body=_index_mappings)
print res
def IndexData(self):
es = Elasticsearch()
csvdir = 'D:/work/ElasticSearch/exportExcels'
filenamelist = []
for (dirpath, dirnames, filenames) in walk(csvdir):
filenamelist.extend(filenames)
break
total = 0
for file in filenamelist:
csvfile = csvdir + '/' + file
self.Index_Data_FromCSV(csvfile,es)
total += 1
print total
time.sleep(10)
def Index_Data_FromCSV(self,csvfile):
'''
从CSV文件中读取数据,并存储到es中
:param csvfile: csv文件,包括完整路径
:return:
'''
list = CSVOP.ReadCSV(csvfile)
index = 0
doc = {}
for item in list:
if index > 1:#第一行是标题
doc['title'] = item[0]
doc['link'] = item[1]
doc['date'] = item[2]
doc['source'] = item[3]
doc['keyword'] = item[4]
res = self.es.index(index=self.index_name, doc_type=self.index_type, body=doc)
print(res['created'])
index += 1
print index
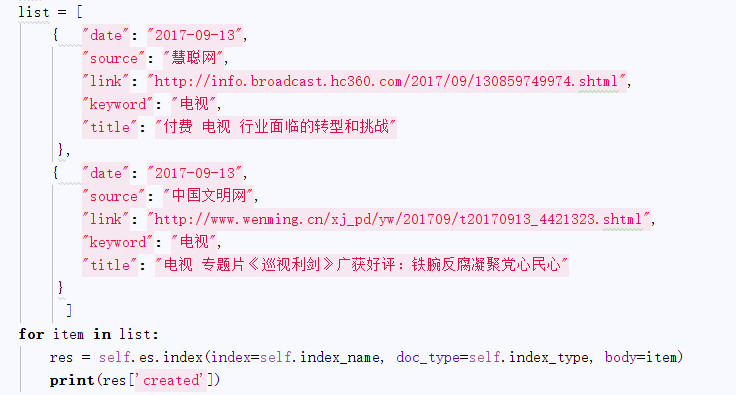
def Index_Data(self):
'''
数据存储到es
:return:
'''
list = [
{ "date": "2017-09-13",
"source": "慧聪网",
"link": "http://info.broadcast.hc360.com/2017/09/130859749974.shtml",
"keyword": "电视",
"title": "付费 电视 行业面临的转型和挑战"
},
{ "date": "2017-09-13",
"source": "中国文明网",
"link": "http://www.wenming.cn/xj_pd/yw/201709/t20170913_4421323.shtml",
"keyword": "电视",
"title": "电视 专题片《巡视利剑》广获好评:铁腕反腐凝聚党心民心"
}
]
for item in list:
res = self.es.index(index=self.index_name, doc_type=self.index_type, body=item)
print(res['created'])
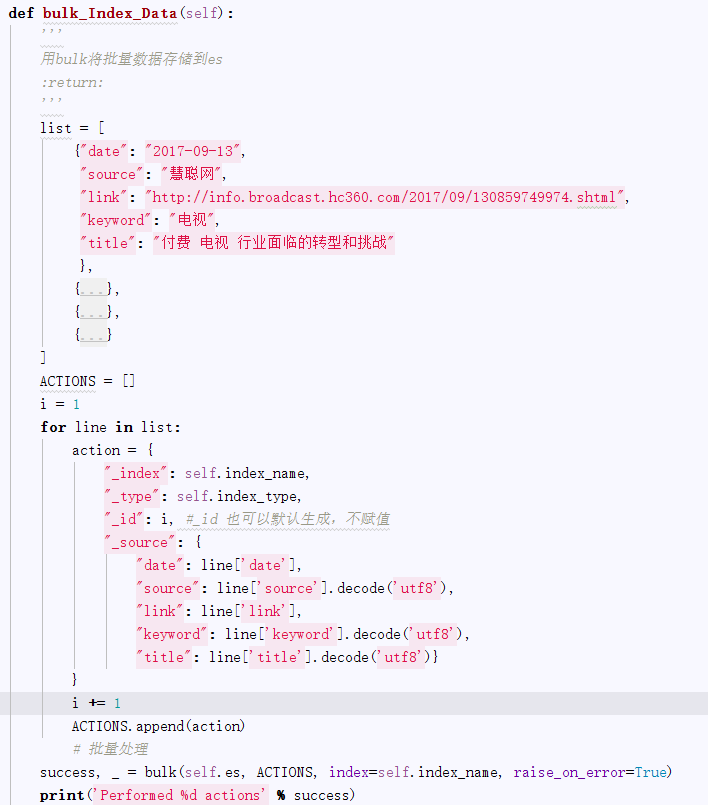
def bulk_Index_Data(self):
'''
用bulk将批量数据存储到es
:return:
'''
list = [
{"date": "2017-09-13",
"source": "慧聪网",
"link": "http://info.broadcast.hc360.com/2017/09/130859749974.shtml",
"keyword": "电视",
"title": "付费 电视 行业面临的转型和挑战"
},
{"date": "2017-09-13",
"source": "中国文明网",
"link": "http://www.wenming.cn/xj_pd/yw/201709/t20170913_4421323.shtml",
"keyword": "电视",
"title": "电视 专题片《巡视利剑》广获好评:铁腕反腐凝聚党心民心"
},
{"date": "2017-09-13",
"source": "人民电视",
"link": "http://tv.people.com.cn/BIG5/n1/2017/0913/c67816-29533981.html",
"keyword": "电视",
"title": "中国第21批赴刚果(金)维和部隊启程--人民 电视 --人民网"
},
{"date": "2017-09-13",
"source": "站长之家",
"link": "http://www.chinaz.com/news/2017/0913/804263.shtml",
"keyword": "电视",
"title": "电视 盒子 哪个牌子好? 吐血奉献三大选购秘笈"
}
]
ACTIONS = []
i = 1
for line in list:
action = {
"_index": self.index_name,
"_type": self.index_type,
"_id": i, #_id 也可以默认生成,不赋值
"_source": {
"date": line['date'],
"source": line['source'].decode('utf8'),
"link": line['link'],
"keyword": line['keyword'].decode('utf8'),
"title": line['title'].decode('utf8')}
}
i += 1
ACTIONS.append(action)
# 批量处理
success, _ = bulk(self.es, ACTIONS, index=self.index_name, raise_on_error=True)
print('Performed %d actions' % success)
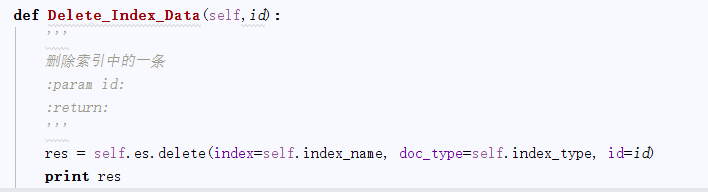
def Delete_Index_Data(self,id):
'''
删除索引中的一条
:param id:
:return:
'''
res = self.es.delete(index=self.index_name, doc_type=self.index_type, id=id)
print res
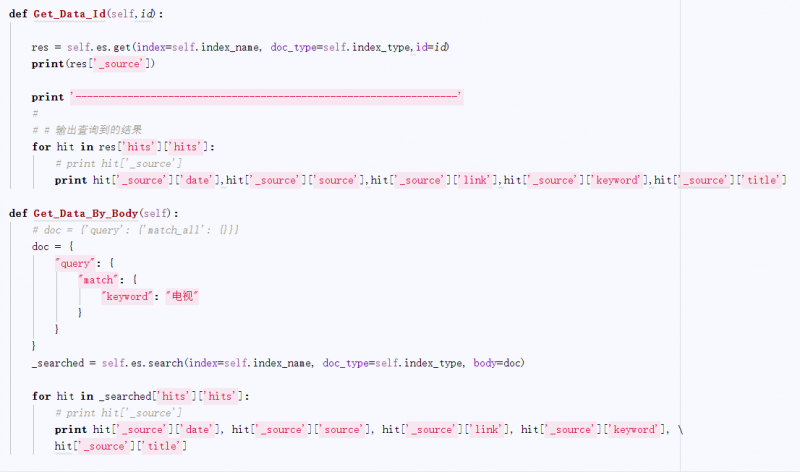
def Get_Data_Id(self,id):
res = self.es.get(index=self.index_name, doc_type=self.index_type,id=id)
print(res['_source'])
print '------------------------------------------------------------------'
#
# # 输出查询到的结果
for hit in res['hits']['hits']:
# print hit['_source']
print hit['_source']['date'],hit['_source']['source'],hit['_source']['link'],hit['_source']['keyword'],hit['_source']['title']
def Get_Data_By_Body(self):
# doc = {'query': {'match_all': {}}}
doc = {
"query": {
"match": {
"keyword": "电视"
}
}
}
_searched = self.es.search(index=self.index_name, doc_type=self.index_type, body=doc)
for hit in _searched['hits']['hits']:
# print hit['_source']
print hit['_source']['date'], hit['_source']['source'], hit['_source']['link'], hit['_source']['keyword'], \
hit['_source']['title']
obj =ElasticObj("ott","ott_type",ip ="47.93.117.127")
# obj = ElasticObj("ott1", "ott_type1")
# obj.create_index()
obj.Index_Data()
# obj.bulk_Index_Data()
# obj.IndexData()
# obj.Delete_Index_Data(1)
# csvfile = 'D:/work/ElasticSearch/exportExcels/2017-08-31_info.csv'
# obj.Index_Data_FromCSV(csvfile)
# obj.GetData(es)
总结
以上所述是小编给大家介绍的Python 操作 ElasticSearch的完整代码,希望对大家有所帮助,如果大家有任何疑问欢迎给我留言,小编会及时回复大家的!