给大家整理一篇相关的编程文章,网友桓萌运根据主题投稿了本篇教程内容,涉及到springboot监听、监听线程执行任务、springboot线程监听、springboot开启监听线程执行任务相关内容,已被419网友关注,相关难点技巧可以阅读下方的电子资料。
springboot开启监听线程执行任务
springboot开启一个监听线程执行任务
public class StartApplicationListener implements ApplicationListener<ContextRefreshedEvent> {

    @Override
    public void onApplicationEvent(ContextRefreshedEvent contextRefreshedEvent) {
        ApplicationContext applicationContext = contextRefreshedEvent.getApplicationContext();
        ApplicationContext parent = applicationContext.getParent();
        if (parent == null) {
            CacheManager cacheManager = applicationContext.getBean(CacheManager.class);
            Cache cache = cacheManager.getCache(MsConstants.NODE_CACHE_NAME);
           new Thread(new Runnable() {
               @Override
               public void run() {
                  //代码

               }
           }).start();
        }
    }
public static void main(String[] args) {
    SpringApplication app = new SpringApplication(FigureServerApplication.class);
    app.addListeners(new StartApplicationListener());
    app.run(args);
}
springboot中监听事件的创建流程
事件监听有同步和异步两种方式,springboot项目中提供了一个用于异步处理的注解:@Async。
事件的大体步骤
- 1:定义一个事件。
- 2: 创建一个监听器。
- 3:确保监听器在容器内。
- 4:发布事件,进行测试。
废话不多说,简单叙述几个不同方式的demo。
首先,我们先创建一个springboot项目。
第一种
1:定义一个事件,需要继承ApplicationEvent
public class MyEvent extends ApplicationEvent {
    public MyEvent(Object source) {
        super(source);
        System.out.println("我是一个事件,目前在事件的构造器内");
    }
}
2:创建一个监听器。直接实现ApplicationListener接口,重写其中onApplicationEvent方法.
public class MyEventListener implements ApplicationListener<MyEvent> {
    @Override
    public void onApplicationEvent(MyEvent event) {
        System.out.println("现在开始执行监听器中的内容,我是直接实现ApplicationListener接口的方式进行的");
        System.out.println("event.getSource() = " + event.getSource());
    }
}
3:将监听器手动添加进应用容器内,并进行发布事件。
@SpringBootApplication
public class EventTestApplication {
    public static void main(String[] args) {
//        SpringApplication.run(EventTestApplication.class, args);
        //第一种:自己手动将监听器添加到application中
        SpringApplication application = new SpringApplication(EventTestApplication.class);
        //添加监听器
        application.addListeners(new MyEventListener());
        ConfigurableApplicationContext context = application.run(args);
        //进行发布事件
        context.publishEvent(new MyEvent("Event数据源"));
        context.close();
    }
}
4:启动主启动类,进行打印测试。
第二种
1:同第一种的1
2:创建一个监听器。
/**
 *第二种:打上Compoent注解,  将事件监听器自动加入到应用容器中
 * 这种方式不需要手动加入到容器中。
 * */
@Component
public class MyEventListener2 implements ApplicationListener<MyEvent> {
    @Override
    public void onApplicationEvent(MyEvent event) {
        System.out.println("现在开始执行监听器中的内容,我是打Compoent注解的方式进行的");
        System.out.println("event.getSource() = " + event.getSource());
    }
}
3:发布事件,后续进行启动类测试即可。
@SpringBootApplication
public class EventTestApplication {
    public static void main(String[] args) {
        ConfigurableApplicationContext context = SpringApplication.run(EventTestApplication.class, args);
        //发布事件
        context.publishEvent(new MyEvent("source"));
        context.close();
    }
}
第三种
全部采用注解的方式
1:同第一种的1
2:创建一个监听器。
/**
 *第三种:采用@EventListener注解的方式,不需要在类上实现ApplicationListener接口。
 * 直接采用的是通过注解,将方法标识为一个监听器。
 * */
@Component
public class MyEventListener3 {
    @Async//异步注解。开启一个新线程。 去掉此注解则会变成同步监听。
    @EventListener(classes = MyEvent.class)
    public void TestListener(MyEvent myEvent){
        System.out.println("我是@EventListener注解的方式实现的监听器");
        System.out.println("myEvent.getSource() = " + myEvent.getSource());
    }
}
3:发布事件,后续进行启动类测试即可。
@SpringBootApplication
public class EventTestApplication {
    public static void main(String[] args) {
        ConfigurableApplicationContext context = SpringApplication.run(EventTestApplication.class, args);
        //发布事件
        context.publishEvent(new MyEvent("source"));
        context.close();
    }
}
以上就是三种创建的方式。
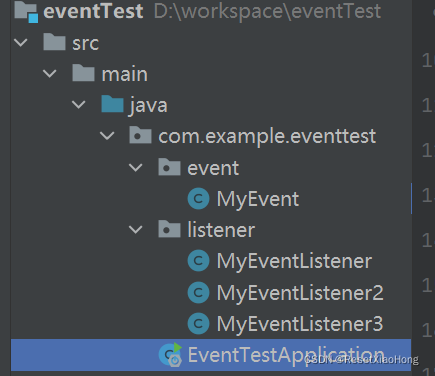
下面是代码的结构图:
总结
以上为个人经验,希望能给大家一个参考,也希望大家多多支持码农之家。


