本站收集了一篇SpringBoot相关的编程文章,网友国庆生根据主题投稿了本篇教程内容,涉及到SpringBoot、集成swagger-ui、swagger分组显示、SpringBoot swagger-ui swagger相关内容,已被817网友关注,如果对知识点想更进一步了解可以在下方电子资料中获取。
SpringBoot swagger-ui swagger
大家好,这篇文章展示下如何在springboot项目中集成swagger-ui。有人说,这都是老生常谈,网上的例子数不胜数。确实swagger诞生至今已经很久了,但是在使用过程中我遇到一个问题,下面给大家分享下我的使用心得吧。
1.swagger配置类
第一步,需要在pom中引入相应的配置,这里使用2.7.0的版本。需要注意的是2.7.0和2.8.0的版本在界面风格上差异很大,如果感兴趣,可以试试2.8.0以上的版本,我比较青睐使用2.7.0及以下的版本,因为界面比较清爽。
第一步 引入pom
<!--swagger-->
<dependency>
 <groupId>io.springfox</groupId>
 <artifactId>springfox-swagger2</artifactId>
 <version>2.7.0</version>
</dependency>
<dependency>
 <groupId>io.springfox</groupId>
 <artifactId>springfox-swagger-ui</artifactId>
 <version>2.7.0</version>
</dependency>
第二步
在代码中加入相应的配置,新建config包,写入swaggerConfig配置类:
import org.springframework.context.annotation.Bean;
import org.springframework.context.annotation.Configuration;
import springfox.documentation.builders.ApiInfoBuilder;
import springfox.documentation.builders.PathSelectors;
import springfox.documentation.builders.RequestHandlerSelectors;
import springfox.documentation.service.ApiInfo;
import springfox.documentation.service.Contact;
import springfox.documentation.spi.DocumentationType;
import springfox.documentation.spring.web.plugins.Docket;
import springfox.documentation.swagger2.annotations.EnableSwagger2;

@Configuration
@EnableSwagger2
public class SwaggerConfig {

 /**
  * 创建API应用
  * apiInfo() 增加API相关信息
  * 通过select()函数返回一个ApiSelectorBuilder实例,用来控制哪些接口暴露给Swagger来展现,
  * 本例采用指定扫描的包路径来定义指定要建立API的目录。
  *
  * @return
  */
 @Bean
 public Docket restApi() {
  return new Docket(DocumentationType.SWAGGER_2)
    .groupName("标准接口")
    .apiInfo(apiInfo("Spring Boot中使用Swagger2构建RESTful APIs", "1.0"))
    .useDefaultResponseMessages(true)
    .forCodeGeneration(false)
    .select()
    .apis(RequestHandlerSelectors.basePackage("com.xqnode.learning.controller"))
    .paths(PathSelectors.any())
    .build();
 }

 /**
  * 创建该API的基本信息(这些基本信息会展现在文档页面中)
  * 访问地址:http://ip:port/swagger-ui.html
  *
  * @return
  */
 private ApiInfo apiInfo(String title, String version) {
  return new ApiInfoBuilder()
    .title(title)
    .description("更多请关注: https://jb51.net")
    .termsOfServiceUrl("https://jb51.net")
    .contact(new Contact("xqnode", "https://jb51.net", "xiaqingweb@163.com"))
    .version(version)
    .build();
 }
}
.apis(RequestHandlerSelectors.basePackage(“com.xqnode.learning.controller”))这个配置是用来指定我们的接口层的位置,大家可以根据你自己项目的实际情况来进行修改。.apiInfo()是定义一些我们项目的描述信息,可以根据实际需要在参数中修改。需要注意的是配置类的头部需要加上@Configuration,声明配置类,以及@EnableSwagger2加载swagger的一些相关配置。
2.使用swagger
我们在刚才指定的接口层使用swagger来说明接口的使用方法。
import com.fasterxml.jackson.databind.ObjectMapper;
import io.swagger.annotations.Api;
import io.swagger.annotations.ApiOperation;
import io.swagger.annotations.ApiParam;
import org.springframework.web.bind.annotation.PostMapping;
import org.springframework.web.bind.annotation.RequestBody;
import org.springframework.web.bind.annotation.RequestMapping;
import org.springframework.web.bind.annotation.RestController;

import javax.annotation.Resource;
import java.io.IOException;
import java.util.Map;

@RestController
@RequestMapping("/api")
@Api(tags = "标准演示接口")
public class ApiController {
 @Resource
 private ObjectMapper mapper;

 @PostMapping("/ps")
 @ApiOperation(value = "接受json参数", notes = "演示json参数是否接受成功")
 public String post(@ApiParam(name = "接收json参数", defaultValue = "{}")
       @RequestBody String json) throws IOException {
  Map map = mapper.readValue(json, Map.class);
  System.out.println(map);
  return json;
 }
}
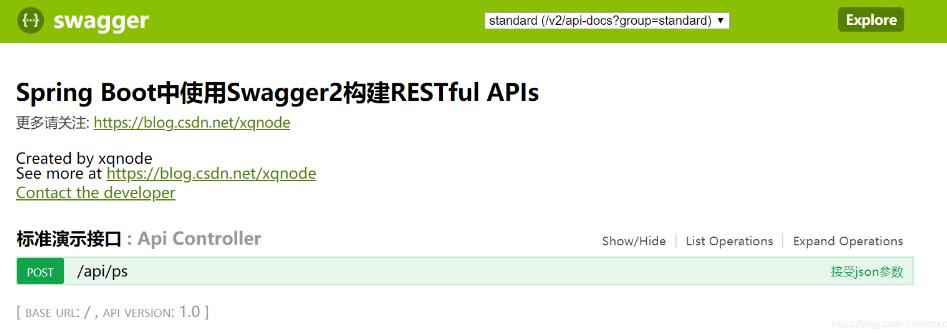
然后我们启动项目,打开http://ip:port/swagger-ui.html:
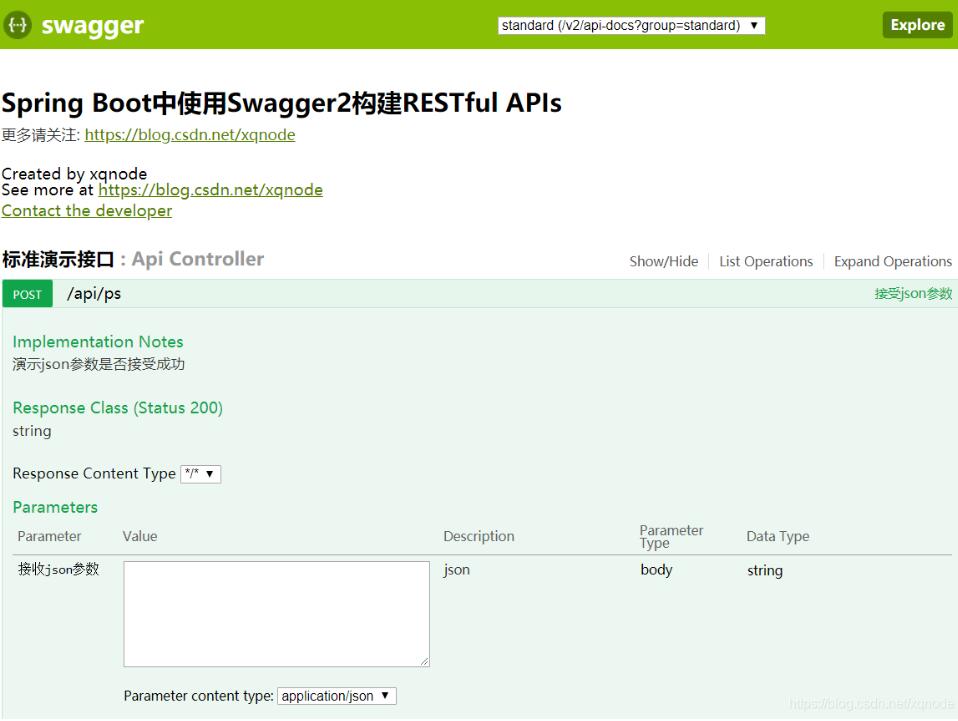
不输入任何参数,点击try it out!按钮:
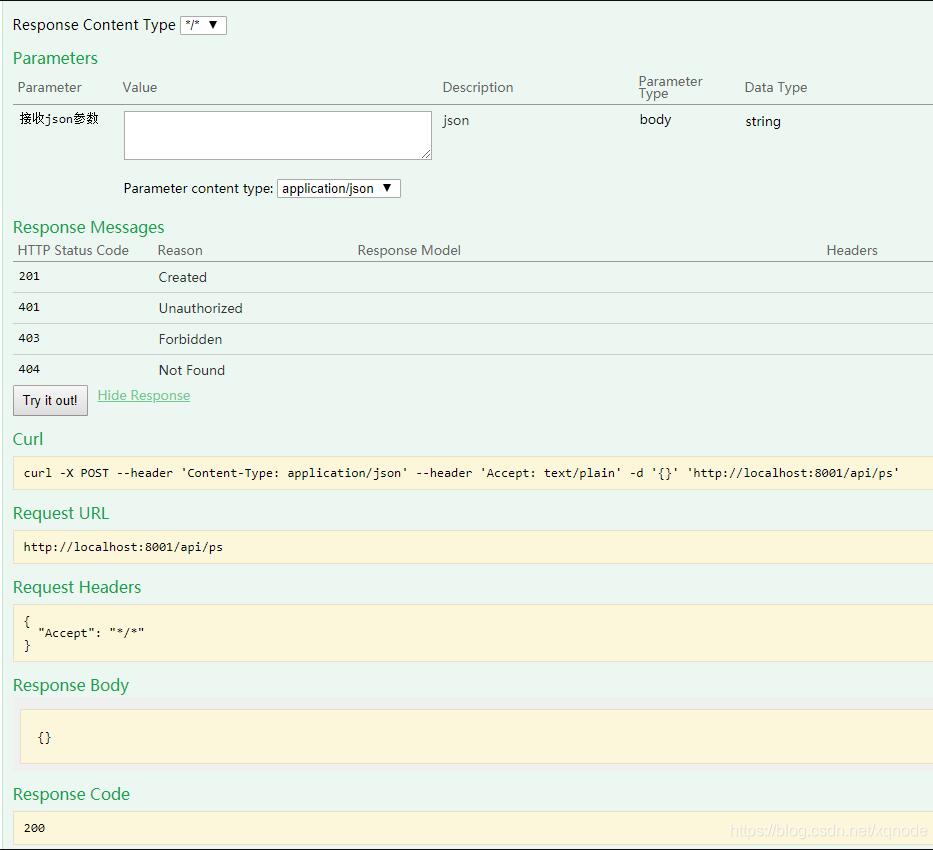
从页面上我们可以看到我们在接口的头部指定的接口类描述(@Api),以及在接口方法上指定的方法描述(@ApiOperation),在接口参数上指定的参数描述(@ApiParam)都已经生效,这都是基于swagger来实现的,但是需要注意的是swagger只能提供接口的描述信息。
3.额外的学习经历
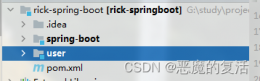
我在使用swagger的时候,遇到一个需求是这样的,我需要在两个接口层都使用swagger,即将两个接口层的api分组展示,例如下面这两个接口层:
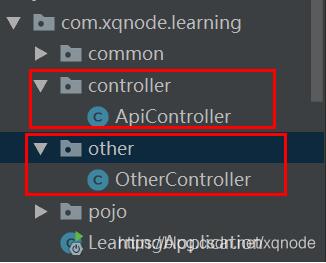
我启动项目后访问swagger页面,发现一个很奇怪的问题,就是other层的接口看不到:
我猜测原因可能是我在配置类中指定的接口层位置影响了swagger api的显示。于是我百度了一下,找到一个解决方案,就是不指定接口层的位置,而指定注解的@RestController
@Bean
 public Docket restApi() {
  return new Docket(DocumentationType.SWAGGER_2)
    .groupName("standard")
    .apiInfo(apiInfo("Spring Boot中使用Swagger2构建RESTful APIs", "1.0"))
    .useDefaultResponseMessages(true)
    .forCodeGeneration(false)
    .select()
//    .apis(RequestHandlerSelectors.basePackage("com.xqnode.learning.controller"))
    .apis(RequestHandlerSelectors.withClassAnnotation(RestController.class))
    .paths(PathSelectors.any())
    .build();
 }
swagger界面中出现了另一个接口的api:
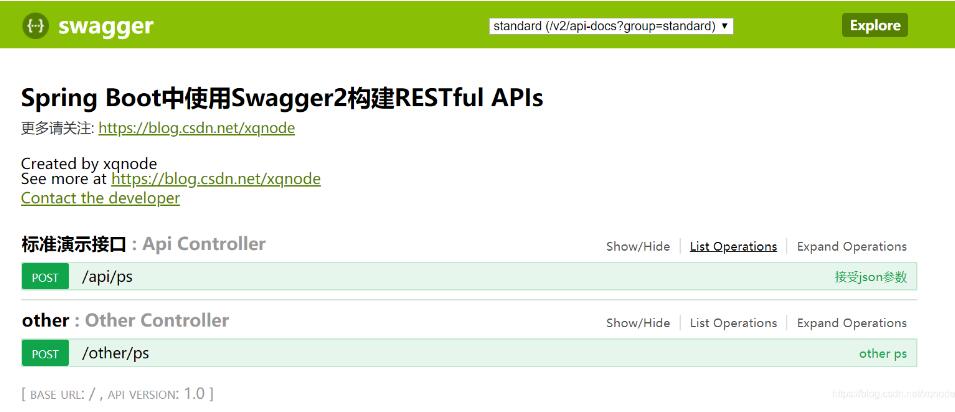
但是这样的效果并不好。大家试想一下,我们为什么要对接口分层呢?不就是为了将业务隔离么,这样在一个界面中出现两个接口层的api,对于我们查找接口非常的不方便,也打乱了我们对接口分层的目的。那么怎么才能将其进行隔离开呢?
其实很简单,我们只需要重新定义一个Docket的bean,在其中指定另外接口层的位置即可:
@Bean
 public Docket restApi2() {
  return new Docket(DocumentationType.SWAGGER_2)
    .groupName("其他接口")
    .apiInfo(apiInfo("Other APIs", "2.0"))
    .select()
    .apis(RequestHandlerSelectors.basePackage("com.xqnode.learning.other"))
    .paths(PathSelectors.regex("/other.*"))
    .build();
 }
我们在这里指定了第二个接口层的位置,同时指定了它的路径前缀,这样我们在swagger页面中就能很方便很清晰的找到它里面的接口了。
接口层1:标准接口
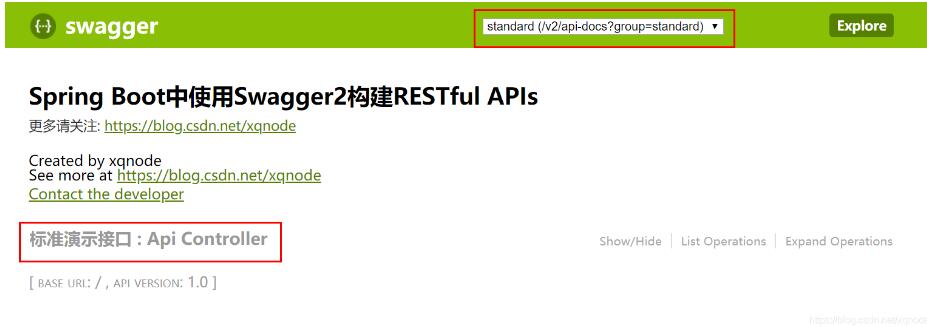
接口层2:其他接口
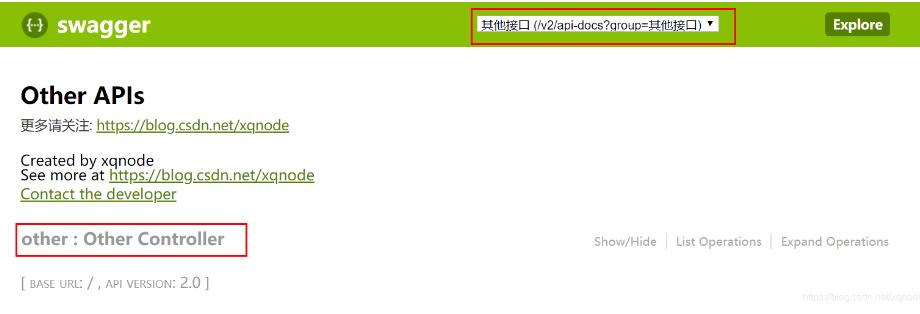
现在我们只要通过切换分组,就可以找到我们关注的接口层的api了。
下面贴出完整的配置类:
@Configuration
@EnableSwagger2
public class SwaggerConfig {

 /**
  * 创建API应用
  * apiInfo() 增加API相关信息
  * 通过select()函数返回一个ApiSelectorBuilder实例,用来控制哪些接口暴露给Swagger来展现,
  * 本例采用指定扫描的包路径来定义指定要建立API的目录。
  *
  * @return
  */
 @Bean
 public Docket restApi() {
  return new Docket(DocumentationType.SWAGGER_2)
    .groupName("standard")
    .apiInfo(apiInfo("Spring Boot中使用Swagger2构建RESTful APIs", "1.0"))
    .useDefaultResponseMessages(true)
    .forCodeGeneration(false)
    .select()
    .apis(RequestHandlerSelectors.basePackage("com.xqnode.learning.controller"))
//    .apis(RequestHandlerSelectors.withClassAnnotation(RestController.class))
    .paths(PathSelectors.regex("/api.*"))
    .build();
 }

 @Bean
 public Docket restApi2() {
  return new Docket(DocumentationType.SWAGGER_2)
    .groupName("其他接口")
    .apiInfo(apiInfo("Other APIs", "2.0"))
    .select()
    .apis(RequestHandlerSelectors.basePackage("com.xqnode.learning.other"))
    .paths(PathSelectors.regex("/other.*"))
    .build();
 }

 /**
  * 创建该API的基本信息(这些基本信息会展现在文档页面中)
  * 访问地址:http://ip:port/swagger-ui.html
  *
  * @return
  */
 private ApiInfo apiInfo(String title, String version) {
  return new ApiInfoBuilder()
    .title(title)
    .description("更多请关注: https://jb51.net")
    .termsOfServiceUrl("https://jb51.net")
    .contact(new Contact("xqnode", "https://jb51.net", "xiaqingweb@163.com"))
    .version(version)
    .build();
 }
}
至此,springboot集成swagger2完成,同时加了一个餐,还满意吧?哈哈
以上这篇SpringBoot集成swagger-ui以及swagger分组显示操作就是小编分享给大家的全部内容了,希望能给大家一个参考,也希望大家多多支持码农之家。