给网友朋友们带来一篇相关的编程文章,网友古鸿振根据主题投稿了本篇教程内容,涉及到Springboot定时器、Springboot webscoket定时器、Springboot定时器相关内容,已被668网友关注,如果对知识点想更进一步了解可以在下方电子资料中获取。
Springboot定时器
问题描述
需要定时通过websocket接口来推送mysql里面最新的数据,自定义了定时器
@Component
@Slf4j
public class  TaskScheduler {
    @Autowired
    private TparkOrderInOutMapper tparkOrderInOutMapper;
    @Autowired
    UserController userController;
    /**
     * 间隔是10秒执行一次
     */
    @Scheduled(cron = "0/10 * * * * ?")
    public void pushParkInfo() {
        userController.findAll();
    }
}
定时器配置
在启动类里面增加定时器的启动入口。
@SpringBootApplication
@MapperScan(basePackages = "com.stop.mapper") //扫描mapper包
@EnableScheduling //配置定时器
public class Application {
   public static void main(String[] args) {
       SpringApplication.run(Application.class,args);
       System.out.println("hello world");
       System.out.println("test");
   }
}
其中,注解@EnableSchedu ling 就是配置定时器。
启动作业
启动作业发现定时器的任务没有执行。查阅资料是因为:
springBoot 默认是使用单线程的Scheduler来处理我们的 @Scheduled注解的定时任务。
我们需要定义一个TaskScheduler的配置类,使用多线程来执行我们的定时任务。
@Configuration
public class ScheduledTaskConfiguration implements SchedulingConfigurer {
    @Override
    public void configureTasks(ScheduledTaskRegistrar taskRegistrar) {
        final ThreadPoolTaskScheduler taskScheduler = new ThreadPoolTaskScheduler();
        taskScheduler.setPoolSize(2);
        taskScheduler.initialize();
        taskRegistrar.setTaskScheduler(taskScheduler);
    }
}
最后运行application的时候,我们可以看到控制上:
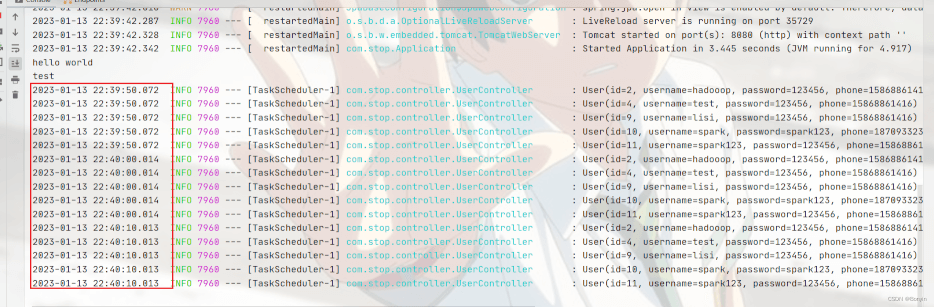
我们可以看到上面定时任务按照间隔10秒在执行操作。
到此这篇关于Springboot webscoket自定义定时器的文章就介绍到这了,更多相关Springboot定时器内容请搜索码农之家以前的文章或继续浏览下面的相关文章希望大家以后多多支持码农之家!